
|
|||
|
Solar Accessories: Cables and Connectors
In the previous article in this series, we covered the fundamental cable types used in an off-grid solar power system. Be sure to read that article, or go back to the first article in this series for a complete overview of how to design an off-grid energy system. In this article, we describe the typical connectors used in off-grid applications. Remember, in solar installations the panels and batteries are always on, so make sure that all the breakers are off when making cabling connections. Even so, be careful when connecting batteries together. Connector Types
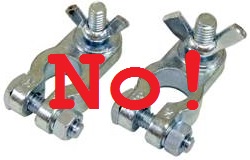
Although some connections, such as those inside the combiner box, will be made with screw terminals, your off-grid solar application will use two types of connectors, cable lugs and weather-resistant panel connectors. It is important to note that you will never use the automotive-style battery clamps, as shown to the right. These terminals never make a great connection, and corrosion inevitably begins to form in the space between the battery post and the clamp. MC4 or Other PV Connector

First note that the cable enters the connector through a special gland, which can be tightened around the cable. This waterproof seal allows the connector to be used in the weather. However, it is good practice to still tuck the connectors out of the weather as much as possible, such as under the panels themselves. 
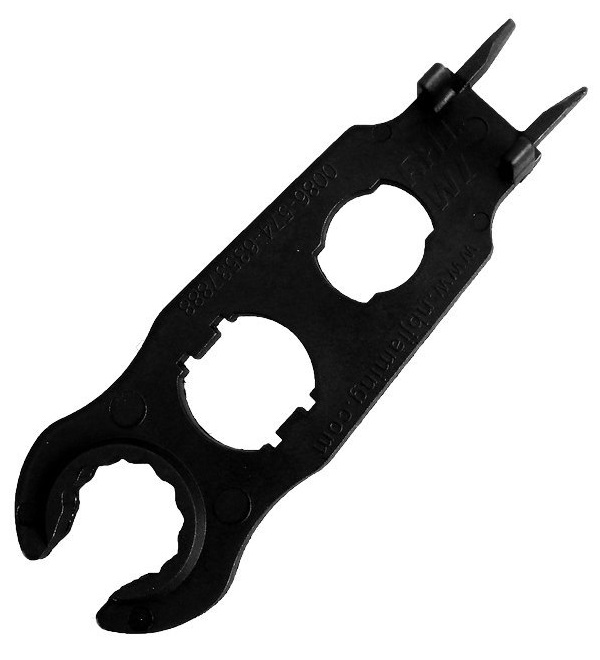
These tools are very handy if purchased in pairs as they can then be used as mar-free tools for tightening the glands. One void on the wrench holds the male or female end, respectively, while the jaws are used to tighten the gland nut. These little wrenches are very inexpensive and are worth having several lying around. We use a 3D printed tool for the same purpose. Always remember to flip the combiner breakers to off before making or breaking any MC4 connections, and never connect the MC4 connectors on a single panel together just for fun. Although the panel can handle the current, the connectors cannot. Be sure to have some extra MC4 connectors lying around for when you forget and hear that pop. 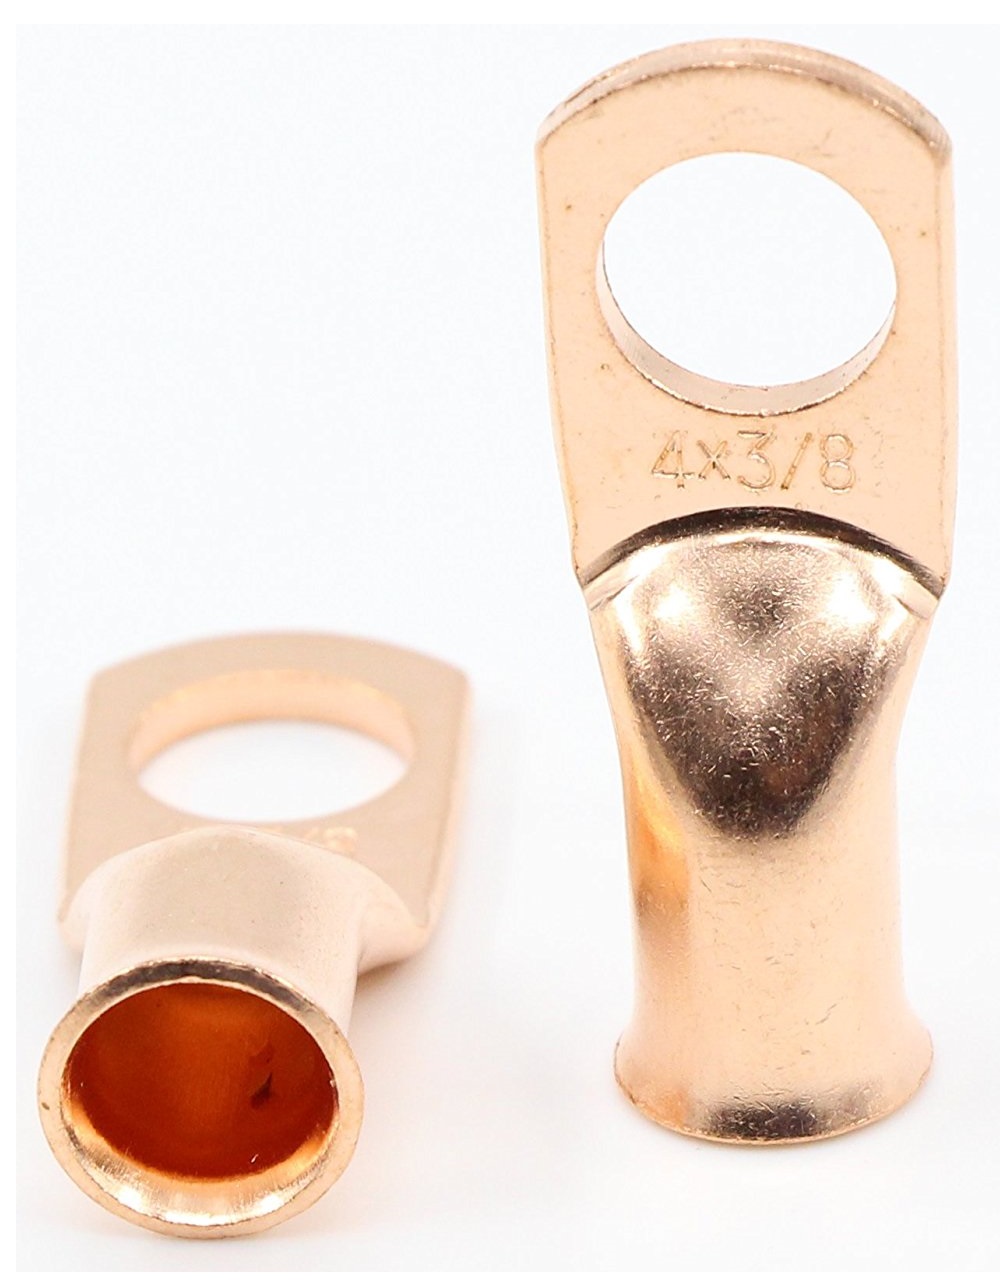
Cable Lugs
The other major type of wire connector in an off-grid system is the cable lug, as shown to the right. As noted previously, the clamp style cable connector is unacceptable in solar applications. When selecting a deep-cycle battery, then, be sure to select a model which features a threaded terminal post. The exact size of the post is not as important as it must have them. To pick the correct cable lug, you will need to know two pieces of information. The first is the size of the cable you are using. As we will see in the next section, you will use several cable sizes. The second piece of information is the size of the threaded terminal posts on the batteries in the array, or in some cases, the terminal posts on chargers, inverters, breakers or other accessories. Looking at the photo, these parameters are listed on the lug itself. In the example to the right, this lug is intended for use with 4 AWG cable, and fits a 3/8-inch terminal post. 
Finally, to make the best connections, brush both the wire and the inside of the lug with flux, crimp, use a blowtorch to heat the lug and then solder the cable end inside the lug the old-fashioned way. This creates the strongest bond, both physical and electrical, and prevents corrosion from eating away at the inside of the lug. A perfectionist would then seal the insulation gap with a length of heat-shrink tubing. Next article: Cable Connections ... |
Announcements
Amateur Radio Solutions Available Our development staff now includes Amateur Extra radio FCC licensees, increasing the breadth of our existing wireless development services. Posted: 12 Nov 2015 Details Here |
© 2001 - 2016 SoftBaugh, Inc. All rights reserved.